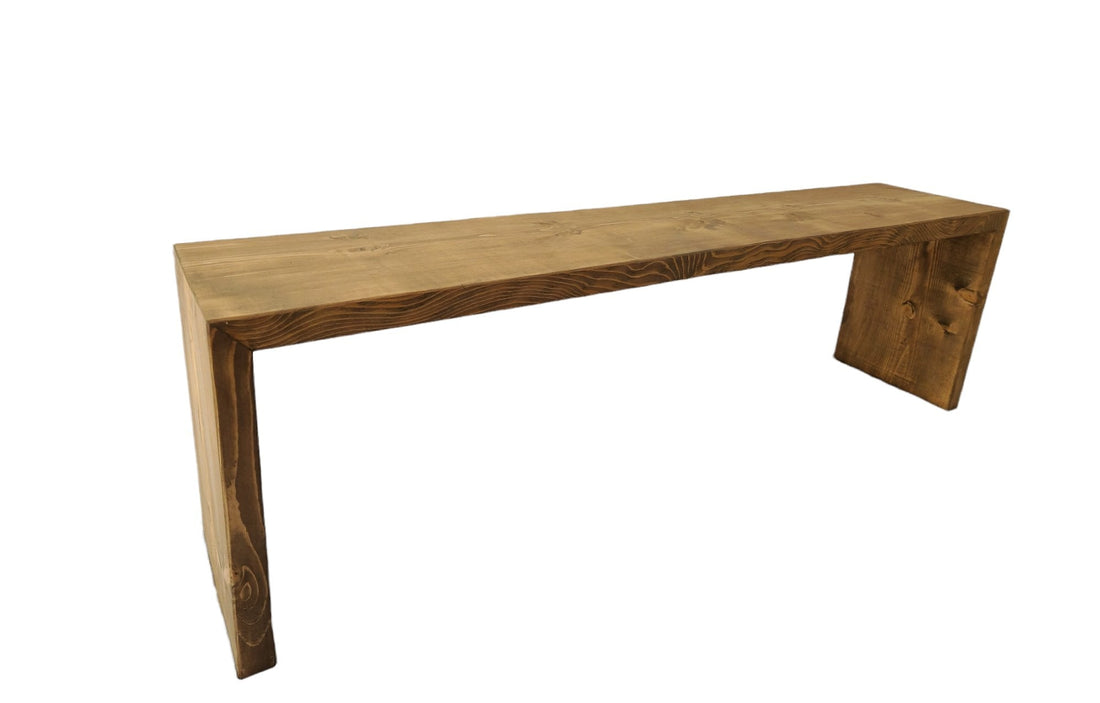
If you’re looking for a creative and functional way to elevate your outdoor space, a DIY waterfall bench is a fantastic project. Not only does it serve as a stylish seating option, but it also adds a unique, modern touch to your garden or patio. Plus, it’s a relatively simple project that can be done over a weekend!
What You'll Need:
-
Wooden Boards (Cedar, Pine, or Hardwood): For the frame and the seat.
-
Screws: To secure the frame together.
-
Wood Glue: For extra support.
-
Saw: To cut the wood to the desired size.
-
Measuring Tape & Pencil: To measure and mark your cuts.
-
Sander or Sandpaper: To smooth out the wood and give it a polished finish.
-
Outdoor Wood Sealer: To protect the bench from the elements.
-
Drill: For pre-drilling holes for the screws.
Steps to Build Your Waterfall Bench:
-
Measure and Cut Your Wood:
Start by measuring the length and height you want for your bench. A standard bench height is around 18 inches, and the length can vary depending on your space. Cut the wooden boards for the legs, seat, and side supports. The key feature of a waterfall bench is the sloping, continuous design, so be sure to cut the seat and sides with a slight angle if desired. -
Assemble the Frame:
Begin by assembling the base frame using your cut wood pieces. Secure the legs to the seat frame with screws and wood glue. The frame should be sturdy, so ensure the screws are tightly fitted. If you want the waterfall effect, attach the seat to the sides so that the wood gently slopes down. -
Attach the Seat:
Once the base is complete, attach the seat to the frame. If you’ve cut a sloping angle into the seat, ensure the ends align with the side supports to maintain that waterfall look. Secure everything tightly with screws, and double-check for stability. -
Smooth the Edges:
After the bench is assembled, use a sander or sandpaper to smooth the surfaces and edges of the wood. This will not only help the bench look polished but also prevent splinters from forming. -
Finish with Outdoor Wood Sealer:
To protect your bench from outdoor elements like rain and sun exposure, apply a layer of outdoor wood sealer. This will help maintain the natural look of the wood and prevent weathering. -
Place and Enjoy!
Once everything is dry, your waterfall bench is ready to be placed in your outdoor space. Whether you position it by a garden, near a pool, or on your porch, it’s sure to be a stylish addition!
Pro Tip:
For an added touch, you can paint or stain your waterfall bench in a color that complements your outdoor décor. You can also add cushions or pillows to make it extra comfortable.
This simple DIY waterfall bench will make a great statement piece in your backyard, offering both functionality and beauty. Plus, it’s a fun project that doesn’t require advanced carpentry skills—just a little creativity and some patience! Happy building!